The VanDea
GPS tracking for you vehicle.
Plot maps of places you already know you’ve been too, but now you have proof!
The Build
Materials
- A GPS device like this. I have setup a part of the code to just use IP address, but from my experience this will only track specific cities you have been in so it’s not as fun.
- A Pi. See this guide for mounting
- Internet access. There are GPS modules that will connect itself, but they are more expensive and need it’s own SIM card. The process should work the same for those though.
- some beer
The Process
Most GPS modules including the one I use will have a magnet on it. Stick it to the roof or wherever inside the vehicle and connect the USB to your computer. Bada bing, bada boom you’ve got the GPS connected.
Testing before we setup further
Now for testing it works before we setup my repository. Run the following to install the dependencies.
1 | The GPS libraries and programs |
Make sure you see /dev/ttyACM0 in the filesystem (the gps module). Write the following to /etc/default/gpsd
1 | Start the gpsd daemon automatically at boot time |
Then run the following.
1 | sudo killall gpsd |
Now to make sure you are getting data (you will need internet depending on the device). Run
1 | gpsmon |
And you should see some data similar to this output.
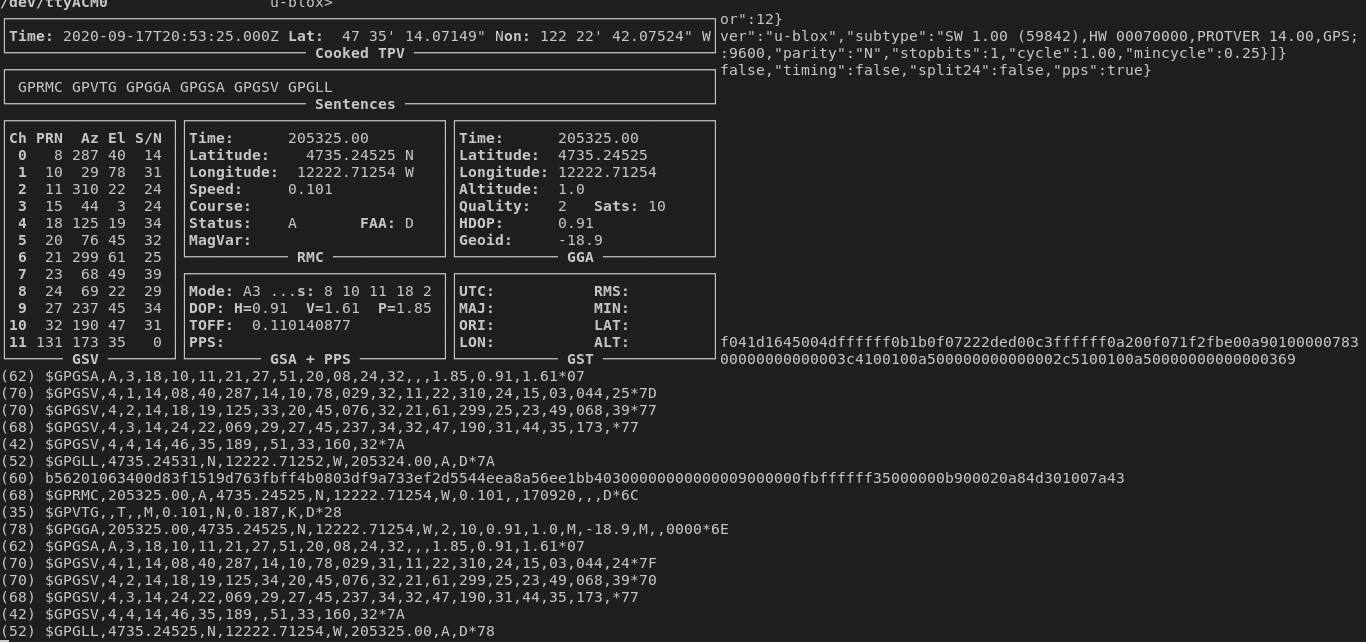
If you can get data to show up from gpsmon you will be able to use my gps tracking project later.
GPS tracking
There are several other projects that will make use of the GPS displaying graphs maps and what not. I’ll post a list below, but for my purposes I wanted to view this in my Grafana instance.
- Commercial resources
- Pi GPS GUI (it uses the adafruit pi hat so I’m not sure it’ll work with the device I use)
- https://www.ubuntupit.com/best-gps-tools-for-linux/
The rest of this portion will be around my Grafana setup.
Grafana setup
I’ll assume you have a Grafana instance setup either on the pi or an external server.
First we will install this TrackMap plugin for Grafana. Run the following command wherever you have Grafana installed.
1 | grafana-cli plugins install pr0ps-trackmap-panel |
This Grafana plugin makes use of an Influx DB, so you will need to install that and setup some credentials for connecting to it. If you don’t care for my code, all you need is a latitude and longitude field in your influx Database (or MySQL if you view the plugin page) to be able to use the TrackMap plugin.
My GPS Repository
We will clone what I have setup to send this data to Influx and Grafana. And then setup a config that will use your Influx DB credentials. You will Nodejs installed.
1 | git clone https://git.chuckfairy.com/chuckfairy/gps-tracking |
Setup a config in config/config.js. Copy the config/config.example.js file from the repo to the location config.js will give you a head start.
1 | module.exports = { |
Test it out by running ./app.js. If all goes well you shouldn’t see an error. Make sure you know the full path for the next step.
For running periodically I use crontab. Run crontab -e and you should enter an editor where we will add the following.
1 | Where "10" is is how many minutes you run. |
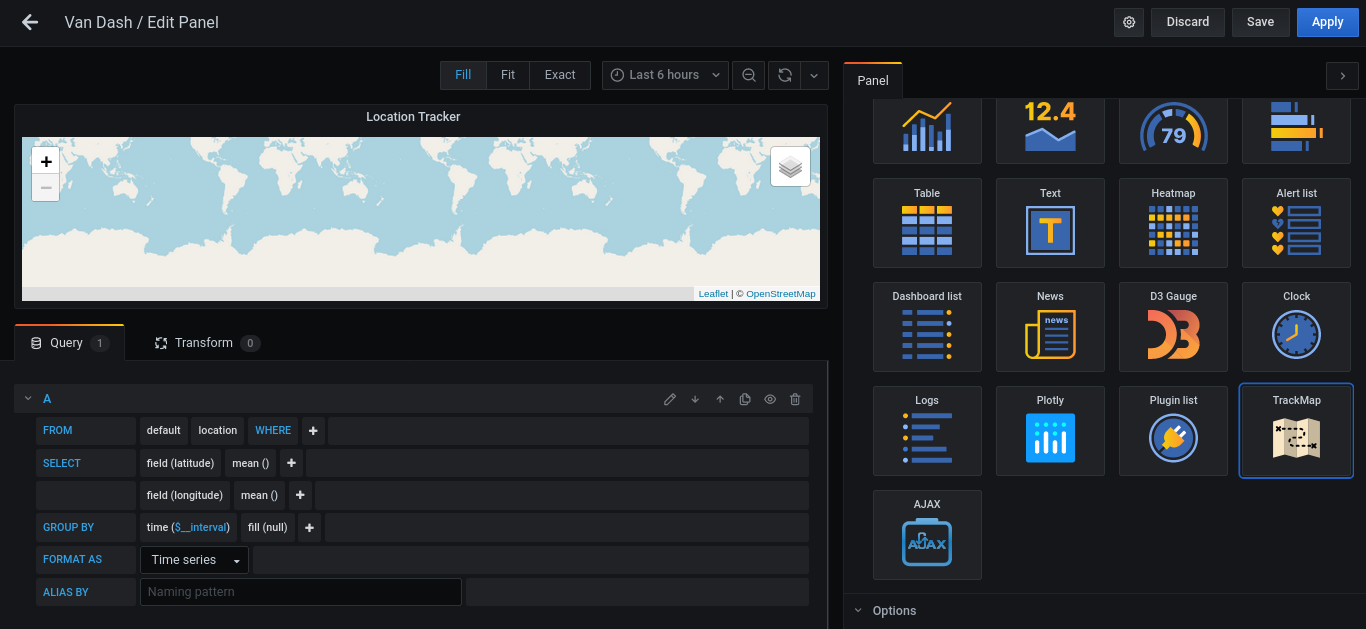
Now to checkout in Grafana. Create a datasource for the influx DB if you haven’t already. I create a measurement called location that you’ll see later. Here is the panel config and what you’ll be doing to setup.
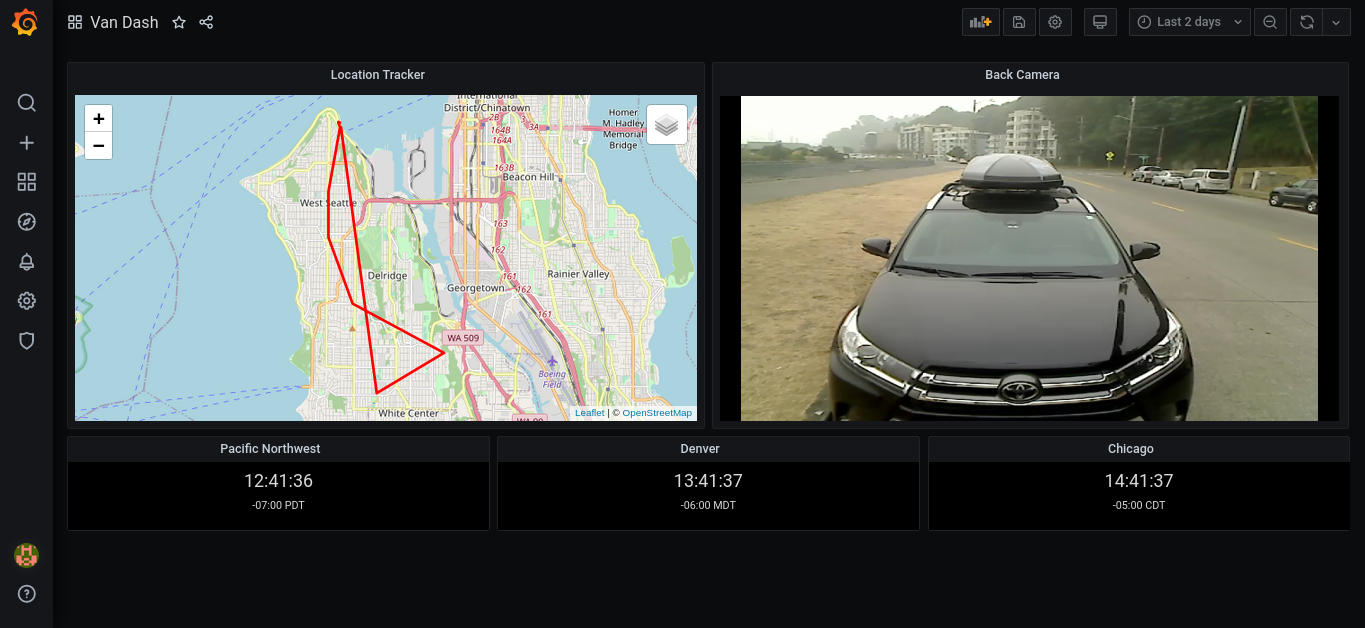
Go out for a drive to check it out with some data. Eventually you’ll see something like the map on the left of my dashboard. Make sure to save the dashboard, I’ve lost plenty of panels to exiting early.
Well
It’s a fun idea to track your travels. I wish I set it up earlier so I could see my trip from Illinois to Washington state. It’s a bit of a setup when you factor in Grafana, Influx, and especially as the USB GPS device is not so plug in play. So I give it an 8/10. In the chance the vehicle is stolen, you’ll be rest assured as you’ll know the location of the chop shop!